I know you have heard me talk about Close to My Heart's exclusive Cricut Collections Art Philosophy, Artiste, and Artbooking. I own all three and love them all. I can honestly say that I rarely use any of my other Cricut cartridges because they are that fantastic. I've even sold off a few of my other cartridges and keep only a few themed cartridges like "50 States" or "Mickey Mouse & Friends", etc. As to holiday cartridges, cartridges with crafting projects on them I am no longer in need of them because CTMH cartridges are so complete with 700 images in each cartridge. They all have beautiful fonts, each one can be used for card making or scrapbooking. Artbooking has lots of 3D paper crafting projects in them and Art Philosophy has a few as well. Each collection comes with 3 stamp sets, 3 Chipboard Dimensional Elements (for embellishment and for mini albums),
Art Philosophy Collection, was the first one Close to My Heart introduced. I highly recommend this one for everyone and particularly if you have a Personal Cricut, aka the baby Cricut machine. To view the digital handbook here in PDF.
Artiste, was the second collection to be introduced and it's geared towards the paper crafting enthusiasts. Great for creating boxes, party favors, banners, and yes even a mini album. You may view the digital handbook or the assembly instruction book here in PDF. There's a second book to show you how to put together the 3D projects.
Artbooking, the most recent collection is geared towards me, just kidding. It really uses the current scrapbooking trends and makes it easier for us crafters. Different types of scrapbooking layouts, 10 mini albums, overlays, great for greeting cards too. View the digital handbook here in PDF format.
Below is a video explain the differences between the three collections. It can be challenging if you must only select one collection.
I hope this helps. If you order online you will receive a FREE Idea Book, a FREE Holiday Gift Guide, and Stamp Set. Just my way of saying thank you.
Hi Paper Crafters! I enjoy reading and writing poetry. Often I am torn between writing and crafting but I decided to combine the two. I took a workshop this summer on writing love Poetry needless to say this was out of my comfort zone. I really admire and enjoy reading love poems but writing them ... I have only a few. Writing I Need a 12" x 12" Step Program was fun, light hearted, and YES I do love Scrapbooking. Sharing this poem with other scrapbookers is fun. People laugh right through it. If others can relate to it and visualize what I'm saying then I've accomplished my goal.
When I first started scrapbooking I remember struggling with how to mix patterned papers, papers with designs on them, so that my page wouldn't look so busy. How did the pros figure out how to mix papers that I would overlook or not even know how to work with? They made it look so easy and for me it was so hard.
My first scrapbook instructor, Jackie, gave me some basic rules that I will never forget. In honor of my first mentor I will gladly share her wonderful tips.
Don't select pattern papers where the circles or dot patterns are larger than the head of people in the picture. This distracts your eyes from the subject matter.
Larger circles or large dots are reserved for large portrait or close up pictures.
Next, it's great to mix dotted and striped pattern papers together.
Select colors found in your photographs and select theme papers or patterns that coordinate.
But then I learned that the scrapbooking industry is willing to help scrapbooking and card making enthusiasts. In fact, every season they select themed colors and coordinate new patterned papers within the same color family to help with coordination.
The new found problem was finding the ink pads to coordinate with the patterned papers. If you were like me I had ink pads from so many companies. I was super happy to find a perfect match from one company only to discover those ink pads I liked were no longer available. Find the right coordination of things is time consuming. Next, finding embellishment to coordinate. I found some with the right theme but the wrong colors, etc.
Then came Close to My Heart to the rescue. Everything coordinates, the papers, the inks, markers, embellishments, no need to shop around trying to find things that matched. It's a quick one stop shop. They have a base line of colors and you can always get more ink pads, re-inkers, cardstock that coordinates, etc. To top things off the quality of their products are top notch. This allows for even simple designs to look incredible. I love that. So I must admit that I'm now becoming a Close to My Heart snob. Shhh! That's our secret okay.
I must say that Close to My Heart has impressed me again. They explain that almost ALL of their pattern papers coordinate and why. Amazing! Someone is finally breaking it down so that everyone can understand. Why didn't someone do this sooner? I always have an extra CTMH patterned paper or scrap and no longer have to worry if it matches. I'll just go for it. Below is a video from Close to My Heart that explains how their patterned papers coordinates with each other regardless if they are from different paper packets. Cool, right?
PS. If you enjoyed this video and would like to learn more just click visit my Online Store.
There are tutorials on so many things including stamping, mini albums, specials, you name it.
I found myself trying to figure out how I can make a Wedding greeting card for a friend who's wedding theme was hockey. She's an avid Flyers fan so the colors are orange and black, also her wedding theme colors. I just couldn't find myself to put a hockey related theme on a card for a wedding but decided to incorporate the wedding colors. Below is my design.
This card was created using both Close to My Heart and non-Close to My Heart products. The paper packet that I used for this card is from a company that is no longer in business. Hey I still have to used my pre-CTMH stuff sometime, right?
The cake image is from a Piece of Cake,D1407, a retired Close to My Heart stamp set and the Best Wishes to You Sentiment is from one of the stamp set in the Art Philosophy Cricut Collection. I used Close to My Heart alcohol ink markers Sky, Honey, Sunset, and Whisper. The card base is made from Daisy White cardstock. Buttons were from a Michael's store find and I used a retired Close to My Heart product of waxy flax that I had in my collection.
The next few posts are going to be YouTube videos that Close to My Heart recently posted and are very interesting. The first one is about how to mix pattern papers and the next one is an informative video about the different Cricut collections. This video is useful if you are trying to decide which Cricut collection is right for you.
If you have had a chance to view the latest Idea Book Fall/Winter 2013-2014, you will notice that they are offering two card making kits. I hosted a workshop where four incredible ladies created 5 greeting cards using the Frosted Card Making Workshop on the Go. This kit includes instructions, paper, cardstock, baker's twine, bling, and of course a D sized stamp. You just need to have scissors, paper trimmer, and ink pads in order to create 15 cards with 3 different card designs. Well I thought it would be good to give the ladies a single snowflake stamp and new create two more cards. Below is one of the cards that I can easily share with you.
This card is a standard A2 greeting card and contains stamped images, patterned paper, and Slatewashi tape.
I used the stamp found in the Frosted Card Workshop on the Go, stamping in Juniper ink, and used a grey sparkle for added touch. Using the Slate Ink Pad and stamp found in the kit I was able to create my version of coordinating washi tape by simply stamping the image. I made "V" notches on both the washi tape and the slate background image and then layered on top. I think it looks terrific together.
I couldn't leave the inside of this lovely greeting card to go bare so I added a sentiment inside.
The Frosted Card Workshop stamp images are fantastic and used the images found in that kit to create this sentiment. Using Champagne ink pad I stamped the background snow. Followed by the snowflake image and sentiment in Juniper ink. The cardstock that I used to mat the sentiment can only be found... you guest it in this exclusive card workshop on the go.
Close to My Heart has done it again. They have come out with some incredible deals that you can't resist. I have also had a chance to preview the new line of products and wait until you get to see what's coming in October. You definitely want to get started on your holiday crafting once you are able to view the new items on October 15th. Don't worry I will remind you when we approach the launch date.
So back to September incredible deals. Who wants more stamps? Me! Me! Me! I can hear you out there.
Get an exclusive You Are My Happy stamp set trio in celebration of National Stamping Month! During the month of September, when you make a purchase of $50 or more, you qualify for this whimsical stamp set trio for only $10. You'll love the whimsical alphabet, light-hearted sentiments, and fanciful images for a variety of occasions to give a cheerful touch to your projects, with a full retail value of $47.90.
Watch the campaign video above and shop online or contact me to place your qualifying order to snatch this darling stamp set trio today! *Offer valid September 1-30, 2013. Placing a minimum order of $50 is required for qualification.
But wait there's more. As always there's also the Stamp of the Month deal to consider. Again if you spend $50 in qualifying purchase you can own a $17.95 stamp for just $5! Awesome right?
September 2013 Stamp of the Month is called "Poster Tidings", S1309, and can be purchase this month only for $17.95 or with a $50 order for only $5.
There are projects for you to try using this stamp on my online store.
In preparing for my Michael's Arts & Craft store class called Stamping Gear I decided to create a holiday card version of the class. It still teaches the techniques and uses their stamps. However, I had to use Close to My Heart products too. It's the only thing I brought along with me on my vacation.
I made four cards but wanted to show you my two favorites. I think you can see why these are my favorites.
This is a 6" x 6" card I used the small center gear and used Topiary and Olive Green Inks. Two stamps from the same stamp set was used. I matted this piece in Chocolate cardstock with an Olive Green card base.
For the inside I also matted the sentiment. This sentiment is from a Close to My Heart stamp called Merry and Bright, found in the current Idea Book.
The sentiment was stamped using Topiary pigment ink and topped with Gold embossing powder. I wanted a gold/green look so I heat embossed it. I love the way it turned out.
This card also measure 6" x 6" and I used the Stamping Gear and stamps to create this lovely affect. Whisper Cardstock was used for the card base, then Twilight cardstock for mat, Daisy White for the stamping base. The color I used to stamp these snowflakes was Twilight. The center snowflake is a Close to My Heart stamp called Snowflake, and can be purchased for only $2.95. I used CTMH Silver Bitty bling on each snowflake.
The snowflake was stamped using Twilight Pigment Ink topped with Clear Embossing Powder. I heat embossed this image and added Silver Bitty Bling for sparkle. The scalloped background was cut out using a CTMH punch and Twilight cardstock.
The Warm Wishes sentiment is from a Close to My Heart stamp called Warm Wishes, currently featured in the new Idea Book.
What can I say Stamping Gear is fun but I still love my Close to My Heart products.
This mini album was one that I created during CTMH Convention and I absolutely adore it. I am sure many of my friends will too. So here's a few of the snapshots of the pages. This album was created using Cricut Cartridge Artbooking, Laughing Lola Dimensional Elements, Laughing Lola Accessories, Natural Baker's Twine, Geometric Shapes stamp, and one cardstock in Colonial White, White Daisy, Olive Green, Honey, Whisper, Lagoon, and Black colors. You will also need glue dots, tape runner, 3D tape, fine tip liquid adhesive, sponge (optional), scissors, and ink pads in the following colors: Olive Green, Black, and Lagoon.
We used Laughing Lola's Dimensional Elements on the cover, the hearts strip was stamped in Lagoon ink. Use your 3D tape for dimension here. All pages were created using Artbooking Cricut Cartridge. It was easy to reconstruct I would easily recommend this project for a beginner to follow along at a workshop.
Again Laughing Lola Dimensional Elements and Accessories really add punch. Artbooking was used to create the photo mat, the Hello greeting, and the arrow. The check board print was created using the Geometric shapes stamp.
All pieces were created using Artbooking and Laughing Lola Accessories were the crown jewel on these darling butterflies. Stamping the patterns on butterflies and arrows adds interest to these elements. Who says background stamps can only be used as backgrounds?
Simple but fun-ctional pages using cutouts and layering dimensional. Again using that background stamp on two elements for more interest.
This has got to be my favorite pages of the mini book. I love pockets! The note book is a Dimensional Element layered on top of a page. I also stamped on green cardstock and layered that on top of a file style photo mat. Arrows are so cute but allows you to add a title to this page.
Honey comb overlays are so popular right now and CTMH knows what we love. Here we can cut out great honey comb patterns and geometric shapes that are right on cue with the market trends. Cut outs with stamping add appeal, dimensional elements add dimension.
Thanks for visiting my blog if you wish to purchase any of these items feel free to visit my site at http://FrancisAmes.ctmh.com
I'm currently on vacation in Maine but I couldn't stay away from the blog for too long. I brought along on my trip my Cricut Expression, Artbooking cartridge, stamps, inks, and cardstock. Well there was one rainy day that allowed me some time to create. I thought it would be fun to create a Halloween scrapbook layout. I think it's been a while since I last created one.
I used the For Always Paper Packet, Sunset cardstock, Smokey Plum cardstock, White Daisy cardstock, Black cardstock, scrap of Crème Brulee cardstock, Black glitter paper, Natural Baker's Twine, and of course Artbooking Cricut cartridge.
The Haunted House, picture mats, moon, bats, and lattice work were cut using the Artbooking Cricut Cartridge. To recreate these items I will refer to the Artbooking booklet/manual.
The Haunted House is on page 71, select: Border, Shift, and V. Cut item at 10" on Black cardstock.
Framed mats can also be found on Page 71, select: Photo Mat 2 and V, cut frames at 7".
The Latice work was cut to Fit Page, image found on page 71. The Latice work can be recreated by selecting the "Overlay" function, Shift, then V. I did trim a portion of it to fit this layout.
Needs some bats. They can also be found on page 71, I cut various of them by selecting "Icon", "Shift" and then "V".
The title Spooky, is also an Artbooking perk. It can be found on page 70, cut to size 7" in black glittery paper. To recreate select "Title", "Shift", and "C".
Again using the Artbooking cartridge I cut most of these pieces found on page 70 in the manual.
To create the title select: "Title", "Shift", and "C". I cut the title out of Smokey Plum cardstock at 7 inches.
Spider web corner were cut by selecting "Overlay", "Shift" and "C" cut at 7 inches as well.
Now we can't forget our spiders. Select "Border", "Shift", and "C", cut one spider at 5" and the second at 3". Using Natural Baker's Twine I just used a glue dot from the spider web to the spider to create a string.
Web Frames are just so neat. I left corners unglued so that I can just slide a picture in there. They were cut at 7" and 6" by selecting "Photo Mat 1", and "V." This image is found on page 70.
The only thing that needs to be added are pictures and a journal that fits perfectly on the bottom left corner.
I hope you enjoyed this layout as much as I had fun creating it. I didn't give paper dimensions because I would love to see what you create using the Halloween paper cut outs using the Artbooking Cricut Cartridge and your scraps just like I did.
If you would like to purchase the Artbooking Cricut Cartridge that's exclusively through Close to My Heart feel free to visit my online store at http://FrancisAmes.ctmh.com
I love the Baby Cakes Paper Packet and when my friend Sherbi asked me to design some baby animal themed thank you cards for a recent baby shower you know that I had to try out the latest Close to My Heart items. So why not share a couple of my designs using nothing but items found in the newest Autumn/Winter Idea Book.
In the first card I used the paper packet called Babycakes (X7173B). To cut out the animals, and the matted background frame I used the new Cricut Cartridge collection called Artbooking (Z1906). New scalloped punch (Z1851) and Bronze Shimmer Trim tape (Z1849) with a touch of Brown Sparkle (Z1753) for bling allowed me to pull this project together.
To reconstruct this or a similar card you will need the following measurements and steps:
One Baby Cake polka-dot B&T paper cut into two strips measuring 1" x 4.25". The polka dot and letter print are on the same paper so you can really use your scraps to create this card.
You will also need Whisper cardstock (found in paper packet) and cut a small strip also measuring at 1" x 4.25".
Using the scallop border punch create the scalloped design out using the three strips measuring at 1" x 4.25.
The card measure at 10" x 4.25", when folded it measures 5" x 4.25" fits a standard envelope.
Select a second patterned paper featuring the animal print. Cut a piece measuring 2" width x 3" height.
Cut a piece of Bronze Shimmer Trim at 4.25" in length and a second piece at 2.5". The shimmer trim has an adhesive back to the ribbon making it easy to adhere to your project.
Babycake Paper Packet also contains the solid cardstock needed such as Colonial White, Chocolate, Sunset (orange) and Buttercup (Yellow). You will need these in order to cut out your pieces on the Cricut machine using the Artbooking cartridge. Do not use Real Dial.
Cut the Chocolate cardstock at 8", turn to page 77 in booklet for image, select Title, then Walking on Water key, then the cut key.
Using the same image cut Daisy White cardstock at 7.5" by selecting Repeat Last, change the size of image to cut at 7.5, then press the cut key. You may also follow step 8 if you are using the Personal Cricut machine.
Now is time to create the lion's body. See image on page 50 in the Cricut booklet. Using the Sunset (orange) cardstock we will cut image out at 7". First select Icon, then "e" key, set size, then cut.
Insert the Buttercup (yellow) cardstock to create the lion's mane and face. Ensure that Icon key is on, then press Shift key and R. Cut this image out at 7" as well.
Now it's time to put all the pieces together. First adhere the animal patterned B&T paper along the crease.
Layer the scalloped pieces beginning from the bottom up. You will layer lettering pattern, whisper cardstock, polka-dot pattern paper. I left a 2/16 inch from the bottom untouched to reveal the Buttercup cardstock. Layer the pattern with lettering, From a scallop border edge to edge I left a 6/16 inch or 1 cm in order to view of the bottom layer.
Next adhere the Bronze shimmer trim long piece horizontal covering the top edge of the scalloped piece. To create the bow just remove the ribbon backing and fold it in on itself. Cover the center with a Brown sparkle. Adhere bow down using a glue dot.
I recommend layering the brown and white mats in the top center half of the card. The Lion can be put together using a liquid adhesives sold through CTMH. Adhere the finished lion to the center of the brown & mat mats.
Cut a second piece of Colonial White cardstock at 3.75" x 4.5" for inside the card. This will allow the for a message to be written of thanks, congratulations, birthday, you name it.
The above card was created using Chantilly Paper Packet, Artbooking Cricut Cartridge, Pear Mini Medley, and Daisy White cardstock. With the exception of the button used all items are in the current Idea Book. To reconstruct this adorable card You will need the following steps and measurements.
Chantilly Paper with floral and bird design should be trimmed to measure 3.5" x 3.5" and also cut a smaller piece measuring 1/2" x 1 1/2" for the banner.
Next using the same patterned paper above (the back side has a green patterned) cut a circle from the Artbooking, image found on page 83 in booklet. Select this image by pressing the Border button, the Shift key, then the All Star button. Circle needs to be cut at 8", No Real Dial were used.
Cut a second circle from the Cotton Candy cardstock by pressing Repeat Last key, then changing the size of image to 6.5".
The third circle was cut using the Buttercup (Yellow) cardstock by selecting Repeat Last key, then changing the size of image to 5".
If you are using a Personal Cricut machine you will need to follow step 2 and change the sizes and card stock to get desired measurements.
The Many Thanks sentiment was from the top edge of the patterned paper. Trimmed the top sentiment out then cut a v-notch to create a ribbon.
Now it's time to reconstruct this card by first adhering the floral/bird patterned paper so that it lays flushed along the left hand side leaving a 2/16 inch border from the top. Next, adhere the green patterned circle, layer the Butter cup (yellow) circle so that it is touching just one corner of the green circle, followed by the Cotton Candy circle so that it overlaps the other two circles.
Using any of the liquid adhesives or Tombo adhesive begin to layer the giraffe pieces together. The completed giraffe should now be adhered. I placed him 3/4 inch from the top of the card and 1.25" from the left hand side.
Now cut a v'notch the Thank You sentiment to create a banner look and then layer it on top of the green patterned paper banner. Adhere these items to the bottom of card as shown. Remember to leave room for the button. To adhere the button I used a glue dot.
If you enjoyed these cards and would like to recreate your own with the same supplies you may order these directly from the Close to My Heart company at my Independent Consultant site at www.FrancisAmes.cthm.com.
I had fun creating projects using Laughing Lola but these projects were featured at the past CTMH convention and wanted to share with you the many ways you can use this lovely paper packet and accessories.
Next time I will feature a mini book using the NEW Cricut Cartridge Artbooking and Laughing Lola embellishments. Check back on Tuesday for the inside scoop.
I love to make simple holiday cards that you can duplicate yet you are proud to present to someone because it looks like you put a lot of effort into them.
So I've created a greeting card using Current New Idea Book items with items that you may already own. I used the For Always paper packet (X7165B), Art Philosophy Cricut Cartridge (Z1686), (NEW) Red Shimmer Trim (z1848), (NEW) Ruby Mini Medley (Z1861), (NEW) Yuletide Greetings stamp (D1553), 3" x 3" Acrylic Block (Y1006), Sponge - optional (Z697), Slate Ink Pad - optional (Z2175) and Black Ink Pad (Z2105). I also used CTMH Ruby (Z2429), Honey (Z2415), Olive (Z2425) and Sky Blue (Z2402) Alcohol Markers.
If you would like to recreate this card for the holiday I've included below the instructions to follow with your Cricut machine.
Turn to your Art Philosophy cartridge booklet to page 43.
You will first insert the chevron patterned paper to create the card base. Select CARD key, square (third row, third key) and cut at 4.25". If you have a Personal Cricut machine you may want to cut this at 4.5" and will need a 5" x 5" envelope.
Next you will cut the Ruby cardstock to create a red frame by removing Card feature and selecting Square key (third row, third key) and cut at 4".
You will need Daisy White cardstock. Cut two shapes at 3.5" by selecting Square key, then cut. One piece will be for the top of the card and second piece will be used for the inside so that you may write your message.
Cut Red Shimmer and Trim tape at 4.25" in length. You will adhere it to the front of the card in the center laying horizontal by starting to place it from the left to the right. You will need to trim the excess from the right of the card due to its peak.
Using a piece of sponge (you may want to cut round sponge into quarters and save the rest for another project) pick up Slate ink using to ink the edges of the Ruby and White cardstock by swiping the inked sponge along the edge of those pieces. If you do not wish to ink piece edges you may skip this step all together.
Adhere the Ruby cardstock onto the center front of the card.
Place your Yuletide stamp onto your acrylic block and ink the stamp image in black ink. Don't forget to place your foam mat stamp insert beneath your white cardstock before stamping.
Next stamp your greeting Yuletide Greetings in Black Ink.
Now color in your images using the alcohol markers. I used the Sky Blue marker for a shadowing affect on the greeting card sentiment.
Now you may adhere this last piece into place and the second white cardstock inside the card.
If you would like to recreate this item feel free to order them online at www.FrancisAmes.cthm.com.
We know the great quality that Close to My Heart offers and their stamps in my opinion are the best. I get a great image every time. So when I read about this month's offer I almost fell over. They are gifting the August Stamp of the Month, $17.95 stamp, for $50 or more orders made online during the month of August 2013 only. Wow!!!
Are these stamps not adorable?
Check out the items featured in the above picture up close.
To place a qualifying order during this time limited offer, visit my online store at http://FrancisAmes.ctmh.com.
Coming soon.. My Purchasing Guide and Holiday Cards ideas. I'm working on a YouTube video tutorial featuring the new Cricut Cartridge Artbooking. I'll let you know when that becomes available. Meanwhile, let the paper crafting continue!
I'm so thrilled that the new Idea Book is now available for customers view and item can be purchase. I can't tell you how hard it's been for me not share all the goodies that I made and learned at convention. Well don't worry I'll do my best to share them. For now take a look at the online version of the Idea Book.
Well there are many good surprises in store for you for example the new Cricut Cartridge called Artbooking. I love this cartridge! Actually I love all of them but this cartridge makes scrapbooking so easy and if you are like me that enjoy creating mini-albums then this is the cartridge for you.
There are two new product lines that were introduced in this catalog: the MyCrush and Base and Bling lines. My Crush is similar to the Smash Books while the Base and Bling is a wearable craft line such as necklace, bracelets, rings,and head bands. I love head bands so you know I will be creating one to match my necklace. Also new home décor items, washi tape, and more glittery ribbon. Who doesn't like bling?
So here's the HOT snippets for your to view in the Idea Book online.
Stamp of the Months are now in the front of album starting on page 11.
Cricut Artbooking collection page 59
My Crush Albums on page 65
Base and Bling starting on page 75
Designer Home Décor items begin on page 71 but check out Page 73.
Need washi tape or glittery ribbon check out page 121.
New how to book Make It From the Heart Volume 2 and previous books in spiral bound on page 141
What's really amazing is Close to My Heart's (CTMH) efforts to make crafting affordable for everyone. Their stamps prices now start at $2.95 and they've dropped their Workshop on the Go (WOG) with starting prices at $24.95 which means hostess can potentially get a WOG for FREE with a party sales totaling $150 or more.
Not only that but CTMH is now offering special stamps and deep discounts just for hostesses. I can honestly say that I want to host a workshop every week just to get the stamps! Check out the exclusive stamps for hostess starting on page 6. I absolutely love the Washi Wonder and the adorable penguin in Wintery Wishes stamps but can see myself using all of the hostess stamps.
The best part of being a hostess
You don't have to open your home to host a "party"
No need to collect money or even deliver products
Host an online party and have your friends look at the products online and place an order directly cutting you as the middle person doing all the work
Earn FREE and exclusive products when party sales are $150 or more
Your friends can get to enjoy this month's great promotion of a FREE Stamp of the Month, a $17.95 when they place a $50 or more order.
Now is the time to host your own online, in person, or catalog party. What are you waiting for to contact me for more details? Orders can be placed if you are located in the US, US Military Bases, Puerto Rico, and Canada. Orders can now be shipped to PO Boxes.
Have you ever considered digital scrapbooking? I know of some people that only scrapbook digitally and I've dabbled with it in the past to get an understanding of how it is done and if this something I would want to pursue. The saying, "Don't beat it until you've tried it.", comes to mind. So I've tried it and actually enjoyed it. I still say that I love paper, texture, and embellishments. After experimenting with digital scrapbooking through Close to My Heart's Studio J online program I must share with you the advantages of digital scrapbooking.
No need to store lots of crafting supplies
No messes to clean up.
Easy to design a page quickly.
Store the pages digitally which takes up less room
Able to share digital pages online like right here on my blog and share them with family and friends on Facebook.
Easy to make duplicate albums as gifts without extra effort or time.
Printed layouts fit perfectly in a scrapbook.
Can still add embellishments and texture to my printed layouts.
Add flip flaps to make layouts interactive and easy way to add more pictures.
Software is free to use and cost effective.
So am I sold on this idea of digital scrapbooking? I think I want to do both traditional and digital scrapbooking. If my family wants a copy of a layout I think digital scrapbooking may be the key for me to produce more in less time. I can always add embellishments to add texture and dimension that I so love. It's a great way for me to use more of my digital pictures without printed them out.
So here are a few of my creations on
This is a picture of my brother and his lovely family. The paper packet used here is current called For Always. Great idea for your next layout using this paper packet right?
I don't think I've ever created a layout about me so I decided to do so here. The paper packet used is current called Claire.
I really like taking pictures of Maine it's just so beautiful. So I just took a few pictures of things that I look forward to when going to Maine. These pictures were taken last year and I plan traveling there again this year. The current paper packet I used here is Tommy.
Another word about Studio J, you can pick and choose current and discontinued paper packets. So if there's a older paper packet that you loved then you can still selected and create your layout. It's also a great way to play with paper without buying the whole store.
I have a few more layouts for me to share with you and many files for me to add pictures to including those with a Disney theme. So if you are interested in Studio J or the pre-made layouts let me know I can send them to you so that you can just add your pictures.
My friends had sent me a message stating that they spotted me in an official Close to My Heart video on Close to My Heart 2013 Convention Highlights. I'm in the second image and again in another part of this video. Wow! I used to say if you don't scrapbook it then it really didn't happen. But since there's a video proving it happened I might need to revise my last statement. Anyhow, I'm attaching the YouTube video for you to watch.


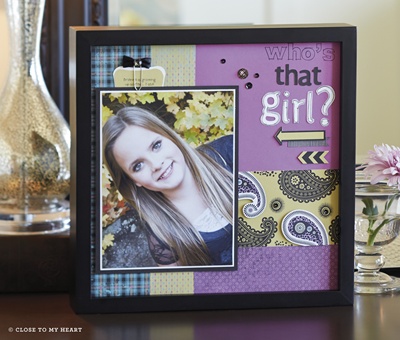 Laughing Lola, X7170B


 Gift shop near by. In Spanish, Panchito is the nickname for Francis.


