Page Header

Showing posts with label Shimmer Ribbon. Show all posts

Wednesday, December 4, 2013

December time to send the Holiday Greeting Cards

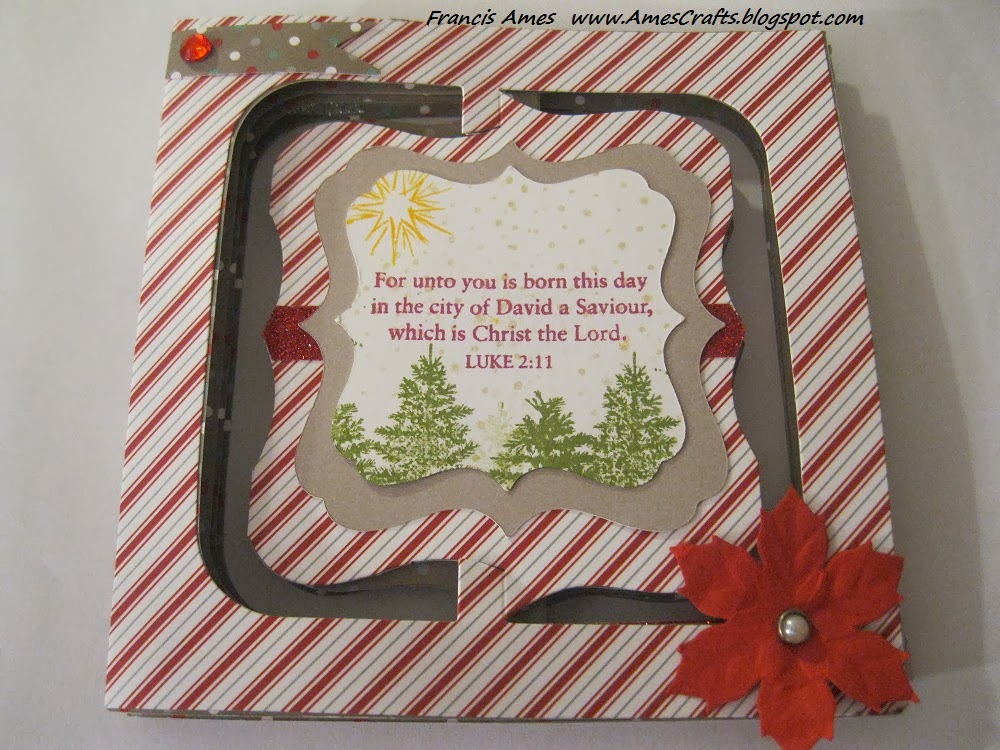
I can't believe it's December already. I've been busy creating greeting cards to send. As time goes on my circle of friends have increase which is a wonderful blessing. Below is a picture of one of the interactive greeting cards that I've made and taught at my last workshop.

Featuring the Sparkle & Shine Paper PacketRed Shimmer Trim, Sparkle & Shine Washi Tape, stamp from the Frosted Card Workshop on the Go, Mary and Babe Stamp, Red Base and Bling Jewels, Silver Shimmer Trim,  Olive Ink Pad, Honey Ink Pad, Ruby Ink Pad, Bamboo Ink Pad, Black Archival Ink Pad, Whisper Alcohol Marker, Olive Alcohol Marker, Ruby Alcohol Ink Marker,
and


This is the inside of the greeting card.
In order to create this greeting card you must first own a Sizzix Bigz die#658038, Accordion Album. I cut six pages out using the Sparkle & Shine paper packet. I place all the pages with the tabs to the right. Tabs are then adhered to the back of the center page.


Using Art Philosophy Cricut Cartridge cut out the center picture frame mats.
First, turn to page 53 in the Instructional Manual to see how to cut out the frame. Select <Square 4>, Cut image out at 2 3/4" out of Daisy White Cardstock. You will need 4 pieces but I recommend cutting out 6 just in case you need extra pieces for stamping. Also cut out the picture frame base out of Ruby (2 pieces) and Whisper (4 pieces) cardstocks at 2 1/2" by selecting <Square 4>.


For the first/cover page, I stamp the star in Honey, trees in Olive, sentiments in Ruby, and snowflakes with Bamboo Ink. The embellishment is a retired item from Close to My Heart.


I particularly like how you can color images using CTMH Black Archival Ink. My recommendation is let the images sit for a minute or two before using alcohol markers. Below is how I decorate page two of the card.
 
I hope you enjoyed this greeting card as much as I enjoyed making it. Hopefully you can make your own version and wow family and friends. Happy Crafting.
 

Thursday, October 10, 2013

Is Huntingdon a Fall or Christmas Paper?

I've created this greeting card using Mojo Monday's Sketch # 314 greeting card pattern and Huntingdon Paper Packet from Close to My Heart. I love this paper packet with its fall and neutral colors. Huntingdon in my opinion can be used a both a fall and Christmas paper. Doesn't the Ruby red and Olive green reminded you of Christmas? So I wanted to challenge myself by using Huntingdon Paper packet with both a Fall theme project and a Christmas project. Well you've seen my fall scrapbook layout in a previous post. Below is my Christmas card.

 
In order to create the ornament I used the Cricut Cartridge Artbooking. To recreate cut the ornament base from Olive cardstock  and Olive B&T paper at 9 1/2", Icon, o. To cut out the snowflake, also cut at 9 1/2", Icon, Shift o, out of Olive cardstock . I then used the VersaMark embossing ink pad to  apply the mix of red and gold embossing power. Use your heat tool to set the embossing powder.  I really like the rusty texture feel and look of the snowflake.

 
I cut the top of the green ornament and using 3D foam tape I layered the Olive B&T paper slightly to the right revealing the Olive cardstock. To adhere the snowflake I used a fine tip liquid adhesive.

 
To create a vintage feel to my greeting card I distressed all cut out pieces using Cocoa Ink Pad.
 
 
I had to use a ribbon for my card but who said I needed to use a traditional ribbon? So I grabbed CTMH Ruby Shimmer Trim and cut it at 7 1/4" and a second piece at 1" and a third piece at 1/2". The Shimmer Trim ribbons have an adhesive back to them so just remove the protective backing to adhere it the 7 1/4" piece about 1/2" from the bottom. To create the bow I folded the 1" piece of ribbon so that the ribbon ends touched each other. Since the ribbon has an adhesive back they stay in place. Next, I used a second piece, the 1/2", and wrapped it around the 1" around the middle. You may need to trim the excess. I find that a glue dot is perfect for securing the bow on top of the shimmer ribbon.
 
 
The card measurements and supplies are listed below.
 
 
Card Base: Ruby Cardstock, x5927, measures at 6 1/2" x 5" folded.
Banner:  Huntingdon Paper Ruby B&T, X7174, measures at 3 1/2" x 1 1/2"
Card Mat: Cashmere B&T, back of the Olive B&T, measures at 6" x 4.5",
Tag: Cashmere Cardstock, x5932, is included in the Huntingdon Paper Packet, measures at 3" x 1"
        Olive Cardstock, 1245, measures at 3" x 1"
Sentiment: Stamp Set Merry & Bright, C1510
Ink Pads: Ruby, Z2170,  and Cocoa, Z2114  
Embossing: Versa Mark Ink Pad, Z891, Gold Embossing Powder, Z668, the red embossing powder is now retired so feel free to substitute or just use Gold embossing powder, Craft Heater, Z555
Ribbon: Ruby Shimmer & Trim, Z1848 and Harvest Baker's Twine, Z1751
Adhesives: Tombo Tape Runner, 1514, Bonding Memories Glue Pen, Z553, 3D Foam Tape, Z1151, and Glue Dots, Z341


I hope you enjoyed how I put this card together. Feel free to leave feedback or show me your creation. Until next time Happy Crafting!