Page Header

Saturday, February 22, 2014

Tutorial for Baby Layout & Card using Arbooking

I love to scrapbook and I love my Cricut machine so marrying the two off with Close to My Heart cartridge called Artbooking you are bound to produce a lovely Baby Layout. So less than a year after launching this Cricut Cartridge CTMH corporate office made this informative video on how to create a baby layout and greeting card. It is a short video worth watching.

Enjoy!

If you would like to order this cartridge featured here feel free to do so at my online store.

Saturday, February 15, 2014

Embossing Folders Tutorial

You may have noticed that lately I have used my embossing folders to create texture in at least two of my most recent creations below.


But did you know that there's a proper way to insert your paper so that you have a great embossed paper? Watch this quick tutorial that shows you how to go with the grain of the paper.

\

I hope to soon see your creations. Just leave a comment with a link to your work.

Thursday, February 13, 2014

Sending You My Love

There was an adorable stamp featured in the Holiday Guide 2013 that's still available online called "Lots of Love" and I was very happy to be able to use it for the below challenges.

Clear It Out Challenge Flowers & Valentine's Day

VivaLaVerve Sketch Challenge VLVF2014 & Color Challenge: Red, Grey, and Pink but did not submit it for the challenge.
 
 
To recreate this greeting card I used Cricut Art Philosophy, Sparkle and Shine Paper Packet, Roxy Paper Packer, White Daisy Cardstock, Whisper Cardstock, Cotton Candy Cardstock, Opaque Pearl Gems, Black Ink Pad, Lots of Love Stamp, Alcohol Markers, Quilling tool, Ruler, Scissors,  3D Foam TapeLiquid Glass, and Tape Runner,
 
  1. This greeting card measures at 4.25" x 5.5" out of White Daisy Cardstock.
  2. Two more pieces of White Daisy were cut at 1.75" x 2.75" for stamping and layering.
  3. Take on piece of the white cardstock measuring 1.75" x .75" and stamp the sentiments "Sending You" on the top portion and "Lots of Love" on the bottom portion with the Black Ink Pad
  4. Next stamp the mail box, the envelope on the second piece of 1.75" x 2.75" white cardstock using the same ink pad.
  5. Layer the mailbox with adhering and with a ruler drawer a wood post or cut a piece of dark cardstock for wood post.  
  6. Adhere the cardstock with the sentiments onto the Cotton Candy cardstock which measures at 2" x 3". I used 3D foam tape to the back of the Cotton Candy cardstock piece to give it lift.
  7. Color and cut the mailbox and letter images then adhere on top of the cardstock with sentiments using 3D foam tape.
  8. The  Whisper Cardstock was the greeting card's mat base and that measured at 4" x 5 1/4".
  9. I cut two pieces of Sparkle and Shine B&T paper at 2" x 2.5" and adhere this to the Whisper cardstock leaving an .25" viewable border. 
  10. The flowers were cut from Roxy paper packet using Art Philosophy Cricut Cartridge. I cut two flowers at 3" and four flowers at 2" found on 68 of the manual by selecting the following <Font>, <Shift>, <FlurDeLs>.
  11. Using a quilling tool I rolled the flowers and put a dime size Liquid Glass in the inside base of the flower.
  12. Hold the rolled flower into place until it's dry. Inside the flower I place a pearl for a finishing touch.
  13. Once all the pieces are cut and stamped it's time to layer following the picture above.
I hope you enjoyed this Valentine's Day card.
 
Until the next time, Happy Valentine's Day!


Wednesday, February 12, 2014

Cricut used in Crush Books what a Smashing Idea!

I know the latest trend of Smash books or CTMH version Crush Books is for quick and easy way to document your life as it is happening.

If you are like me a more traditional scrapbooker that's okay. The video below is a great example of how you can elevate your memory books using the Cricut Cartridge Artbooking.

 
I hope this elevates your Crush for scrapbooking and Cricut Artbooking.
 
Keep on scrappin'!

Sunday, February 9, 2014

Thanks for the Lift

So often I'm in need of a thank you card. Lately, I've had some dear friends share their appreciation of me for being there for them in need. This has inspired me to create the next theme for my card called "Thanks for the Lift". I've submitted this greeting card to FreshlyMadeSketches which meets Sketch#FMS122. I like the simple lines of this sketch and had so many thoughts running through my mind. I though this might be easily duplicated by you at home.


To recreate this card is very simple. You will need a the following directions though...
  1. A full White Daisy Cardstock measuring at 12" x 12" for the entire card in order to cut the following pieces.
  • First cut the overlay found on Page 41 in your Artbooking Cricut Cartridge manual, by selecting Overlay key, then shift, "$". I used one of my scraps so I believe I cut this piece at 2".
  • You'll need to create a card base measuring at 4.25" x 5.5" folded.
  • A piece for behind the overlay measuring at 2 2/16". You may cut 2.25" and cut around the edges if you are unsure about the measurements.
  • Cut two more pieces measuring at 3" x 2" for the stamping the cloud background and for the air balloon.
  • A small piece is needed for the banner with the sentiment. A scrap of white measuring at 1.5" x 3" will be sufficient.
     2.  Lifting Spirits Stamps C1570, used here was featured in the Holiday Guide 2013, you may use the newest stamp Give a Lift, D1581 as a great option. Don't forget the Acrylic Block 2"x3.5".

     3. Whisper Cardstock measuring at 4" x 5.25".

     4. Stamp the air balloon in Whisper Ink as a background onto the Whisper Cardstock.

     5. Using the same balloon image stamp the air balloon in black ink onto White Daisy cardstock.

     6. With the black ink stamp a banner onto your small White Daisy cardstock. The sentiment was stamped in Lagoon Ink. Now hand cut your banner with its sentiment.

     7. Next, stamp the two cloud images in either Sky or Juniper ink onto a White Daisy cardstock.   
      
     8. You'll need a piece of Sky cardstock to mat the sky image you've just stamp. The mat should measure at 2.25" x 3.25". Adhere the stamped cloud background onto the Sky cardstock .

     9. It's time to color in your air balloon. I used alcohol markers but water color pencils will do nicely. Once colored hand cut your air balloon and adhere to the white cardstock with the cloud background.


    10. It's time to put all your pieces together.
  • Adhere your Whisper cardstock mat with the air balloon image stamped as a background onto the  White Daisycardstock.
  • Using a fine tip adhesive pen adhere the overlay onto the  White Daisy cardstock and then adhere both pieces on top of the Whisper cardstock about .75" from the bottom.
  • The Sky cardstock mat with the cloud background should be placed about .25" from the left and 1" from the bottom of the card.
  • You may how adhere the air balloon by tilting it slightly to the left and the sentiment across the bottom of the sky mat using 3D Foam tape.

Until the next time... Happy Crafting!

Unscripted Sketches Challenge Top 3 Pick

Thank you Unscripted Sketches for selecting my greeting card as the Top 3 Pick for Sketch# 242. It was a pleasant surprise.

On details of how to recreate please view preview post.


Friday, February 7, 2014

Birthday Card using Ariana

Here's a greeting card that I made for my friend's birthday using Ariana
Paper Packet and by following UnscriptedSketches.com sketch#242.

 
To recreate this card you will need the following supplies and measurements:
Ariana Paper Packet (X7179B)- Floral 4.5" x 4.5", Blue 2" x 2.75",
Stripped 2" x 2.5", Green .75" x .5"
White Daisy Cardstock for card base 5" x 5" folded
Paper Doily
Artiste Collection Stamp Birthday (D1529)
Recollections Flowers
Color Ready Butterfly (retired)
Art Philosophy Cricut Cartridge for the Ticket
 
 
Distress all the cut pieces from Ariana Paper Packet using the edge distresser. Adhere the small green patterned paper to the bottom right hand side of the floral patterned paper folding over about a .25" over towards the back (as pictured). Adhere the floral patterned paper centering in front the card base.
Layer the paper doily to the top left hand side leaving 2 cm border from the top and left hand side. Next place the dark patterned paper, followed by the striped patterned paper. Using 3D foam tape place the large flower at the bottom right corner of the dark blue patterned paper. Place the butterfly inside the foundry pin clip and insert into the 3D foam tape in the back of the flower. Using the baker's twine tie a knot through the button and secure using a  glue dot. Also place a smaller bling on top of the green patterned paper. Now, it's time to cut the sentiment ticket found on page 25 in the Art Philosophy instructional manual. The ticket was cut at 1.5" by selecting the 5th white key on the top row. If you want to manually cut a piece of cardstock for the sentiment, the ticket measures 2.5" x 1.25". I also tied baker's twine to the top right hand side and adhered securely using Tombo Adhesive. I hope you enjoyed this card and hope you will recreate your own.


I won a blog challenge

I won a blog challenge Color Challenge 14-4 at Cuttin' and Stampin'. It was a pleasant surprise.


Cuttin and Stampin Challenges

My winning submission is shown below.


Thank you Cuttin' and Stampin!


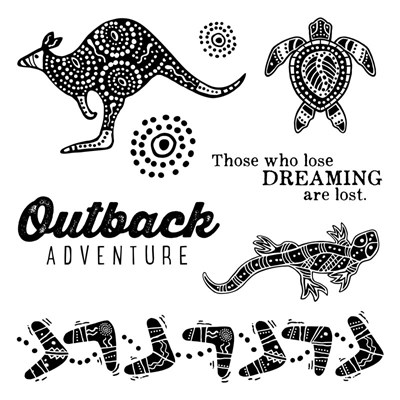
Exclusive Aussie Stamps Available

Aussie CTMH Stamps now available online. These stamps are not found in the NEW Idea Book (Spring/Summer 2014)
http://francisames.ctmh.com/ctmh/products/online-idea-book.aspx


Australian Salutations  Item Number: C1585


Australian Thanks              Item Number: C1586


Outback Adventure     Item Number: D1596 


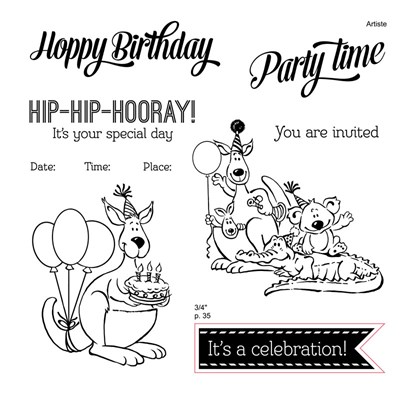
 HoppyBirthday     Item Number: D1597


Aussie Praises           Item Number: D1598


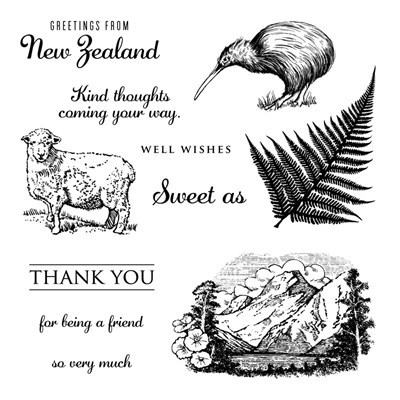
New Zealand Greetings     Item Number: D1601


Wednesday, February 5, 2014

Freshly Made

I found another blog challenge from Canada called Freshly Made Sketches and have a card that meets their FMS122 sketch challenge.

 
I created this card using Recollections patterned paper, cork board, burlap, glitter cardstock, Recollections bling, and Inkadinkado stamp. To create an embossing effect I used CTMH pigment inks and heat set it using Clear embossing powder. Did you notice that on the green patterned paper I also stamped branches? I used Versamark ink and then clear embossing powder.
I hope you like this card.

Signing Your Praises Thank You Card

So many artistic challenges and so very little time. I just managed to get this one finished in time for the Viva La Verve blog challenge deadline. Below is my January Week 5 card submission called "Singing Your Praises", a thank you greeting card. This was also submitted to the Unscripted Sketches, challenge #40.


This card can be easily duplicated at home. All you need is a few supplies listed below.
Chocolate Cardstock
Colonial White Cardstock
Chevron Embossing Folder
Avonlee Paper Packet (discontinued)
Fabulous You Stamp, C1533
Black Momento Stamp Pad or Black Archival Stamp Pad
3" x 3" My Acrylic Block
Alcohol Markers or Watercolor pencils
Cricut Cartridge Art Philosophy or Artiste or Artbooking or Platin Schoolbook for a circle
Edge Distresser
Sanding Tool Kit
Adhesive
Scissors
Basic Grey Brad
 

To recreate this card you'll need the following cutting measurements:
Chocolate cardstock: 4" x 4.75", 4.5" x 1", 2.5" x .75" for the banner, and the circle is 2.75" in diameter
Colonial White cardstock: 4.25" x 5" folded for card base, 2.25" x .5" for the banner, 2.25" diameter
Green Avonlee Patterned Paper: 3.75" x 4.5"
Blue Avonlee Patterned Paper: 2.25" x 3.5"


Distress all the edges including the circle and sentiment banner using the edge distresser. Stamp the image on the Colonial White circle wait a minute or two for the ink to dry and then color in. Emboss the strip of chocolate cardstock using the Chevron embossing folder. Distress the embossed strip using the sand paper or block to reveal the white core and the chevron design; also distress the edges of the strip. Place the brad on the bottom left side of the blue paper. Adhere all the pieces to card base.

Baby Card

It's always a good idea to have a selection of greeting cards for all occasions. Below I've created a generic baby card where its colors are neutral. The design of the card was inspired by RetroSketches card challenge, RS100

 
To recreate this greeting card. You will need the following supplies:
 
I created the dresser drawers by adding 3D foam tape and layered the textile and teddy bear between the drawers to give it a realist appearance.
 
Feel free to give it a try. Try using patterned papers, embossing the drawers. I'd love to see your take on it.

Until the next time, Happy Crafting:)

New Embossing Folders!

Yippy! Close to My Heart now carries Sizzix embossing folders. There now offer five versatile patterns to give your cards texture, interest, and design.


Chevron Embossing Folder


Damask Embossing Folder
http://francisames.ctmh.com/Retail/Product.aspx?ItemID=7668&CatalogID=691Dot Embossing Folder


You can purchase any of the above embossing folders for $8.95 each. This month only there is an incredible sale. You can get any of the above embossing folders when you purchase 2 cardstock packages this month only. Basic, White Daisy, Colonial White or Kraft cardstock do not qualify for this special.
To order your cardstock packages click here.
 
Remember this is an exclusive sale for this month only.

Tuesday, February 4, 2014

Happy Birthday


My husband's birthday is next week and thought that I could use a card challenge to help me design a card. I used Mojo Monday's sketch MOJO331 without the hearts and made it more masculine.


Here I used Close to My Heart's cardstock colors:
White Daisy for the card base (A2 size), Outdoor Denim, Whisper, and a retired scrap of Elemental Paper. The embellishments are also CTMH but are retired products: chipboard pieces called Milepost Shapes and the metal pieces are Durable Square Post. I recommend substituting the metal pieces with Durable Triangle Studs. The tag was created using a stamp set from the Art Philosophy Cricut Collection. I stamped the sentiment and inked the chipboard pieces using Outdoor Denim stamp pad. The cardstock pieces were embossed using Sizzix folders. Using a sanding kit's sanding paper I went over the embossed pieces to reveal the cardstock's white core. Did you notice the silver washi tape across the top? It's Sparkle & Shine from the Holiday Guide 2013.
 
 
Did you know Close to My Heart now carries Sizzix embossing folders. Read my next post for details on how you can purchase or get one for FREE.

Sunday, February 2, 2014

Delicate Rose

I can't wait until the spring time. The sight of flowers in bloom, birds chirping by the window, and the sound of children at play outside. This greeting card reminds me spring and meets two more blog challenges.

Mojo Monday. Card Sketch Challenge Mojo330.
Splitcoaststampers. Clean and Simple Cards Color Challenge CAS257


I've created this card using a brand new paper packet called Balloon Ride. The roses are from a retired stamp set called Happy Valentine's Day.

I enjoyed making this card but was a bit to late in posting my card to the Mojo Monday card challenge. Either way, I think it came out nicely.

Valentine's Day Card Challenge

I've got Valentine's Day on my mind lately and thought that my next greeting card should match my thoughts. Here's a greeting card that I've created to meet two blog challenges

FreshlyMadeSketches  FMS121 Sketch challenge

Cuttin'andStamping Color Challenge Pink, Orange, and Grey

Heart2HeartChallenge  A Challenge about Love using CTMH products

 
I had real fun playing with my Cricut Artbooking Cartridge to cut out my picture frame and couple. The picture frame is found on page 41 and the couple is on page 58. The larger heart can be found in one of the stamp set from the Cricut Art Philosophy collection. The smaller heart and sentiment are from Whooo's Your Valentine stamp set. The paper is from Dream Pop. For a finishing touch I used small sparkle flourish, bling sparkle, and Paradise Baker's Twine. To add dimension I used foam squares of course. I used a couple of inks including Ruby stamp pad and Hollyhock pigment ink pad.