Page Header

Sunday, February 24, 2013

Digital Scrapbooking

Have you ever tried digital or online scrapbooking? Close to My Heart has a tool called Studio J that allows you to create your own scrapbook layouts online, available for print and mailed to your home with page protectors. Right now you can get a double layout for just $5!


February 2013 Constant Campaign- Digital Delights!

 
February and March are sure to be months of digital delights because you can purchase any Studio J® layout for only $5—that’s a savings of $1.95 per layout! This is a great opportunity to try Studio J for the first time. Create adorable baby layouts with the Wishes and Fishes kit (shown), or use the new Express Collections with collections of 10 ready-made layouts plus a front and back cover that are easy to use and professionally designed. Preserve your memories at a low price for a truly digital delight!

*Shipping/handling applies. Studio J credits must be redeemed before this promotion can be applied. Offer valid February 1 – March 15, 2013.
 
You can give it a try by visiting my website http://francisames.ctmh.com and selecting Studio J.

Friday, February 22, 2013

A Garden Stamp a Favorite

I must admit that A Garden is one of my favorite go to stamps. Cindy, from the blog Paper Pads and Pictures, first introduced me to this stamp and since then I have used it to create various greeting cards, a milk carton, tags, and included it in a mini scrapbooking album.

The below is a standard 4 1/2" x 5" greeting card that was created using A Garden stamp (A1119), left over scraps from the Chantilly Paper Packet (X7163B), Chantilly Dimensional Elements (X7163C), Washi Tape (Z1817), Lagoon Ink Pad (Z2195), Black Ink Pad (Z2105),  Sweet Leaf Ink Pad (Z2153), and Honey Ink Markers (Z2415). The non-Close to My Heart products that I used was the Sizzix Cuttlebug embossing folder and machine.

Close to My Heart cardstock has a white core which means when you sand its white paper core is revealed. I cut the center mat from Honey cardstock at 4" x 4 1/4". Using the Cuttlebug machine I embossed the Honey cardstock found in the paper packet then sanded it down. Can you see how the embossed areas with the flowers and bird are more prominently visible now that it has been sanded?

 
If you do not have a Cuttlebug embossing folder or machine consider using Chantilly paperned paper featuring the flowers and birds.
 
Also found in the paper packet you will find the rest of your cardstock pieces. Cut two pieces of Lagoon cardstock measuring at 3" x 2" and 2 5/8" x 1 1/2". Also cut one Chantilly BT/Patterned Paper at 2 6/8" x 1 3/4" and one piece of Daisy White Cardstock measuring at 2 1/2" x 1 1/4".
 
Stamp the folliage onto the Daisy White cardstock using Sweet Leaf Ink Pad. followed by stamping the bird in Black Ink Pad, and the Hello sentiment in Lagoon Ink Pad. Fill in the bird with Honey marker.  Now adhere this stamped piece to the Lagoon cardstock.
 
Now adhere all parts into place; the patterned paper onto the second Lagoon cardstock, the embossed Honey cardstock to the center of the card, and both matted pieces on top of the embossed cardstock.  For the finishing touches place washi tape on the corners of the card and place the dimensional elements for embellishments.
 
If you like the stamped images this stamp is currently available for purchase for only $6.95 at http://francisames.ctmh.com
 

Wednesday, February 20, 2013

Many Uses for Washi or Decorative Tape

Anyone that's recently scrapbooked with me will tell you that I keep mistakely call washi tape with wasabi tape. I think its because I keep craving for sushi? Although I may misprounced the name I certainly know how to use it! So I thought it would be useful to share with you some tips on how to use washi tape.

Washi tape is a decorative tape that can be used to use on greeting cards, and scrapbook layouts. There are many uses for washi tape and I have used them in the past to create
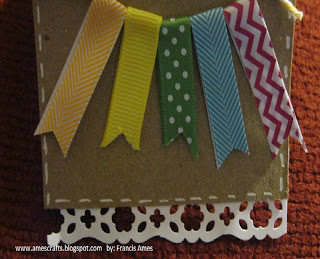
  • A banner on greeting cards or even scrapbook pages

  • Thread it through a tag to create an easy way to pull a hidden journal
 
  •  Make a rossette and embellish with a button as shown on the blog www.paperpadsandpictures.blogspot.com
  • Create a background out of various patterns and colors
  • Tape down photographs into your scrapbooks or Smashbooks
 
  • Tape the borders of your matted pictures or the front of your greeting cards

No matter how you use wasabi, I mean, washi tape I'm so happy to have some in my crafting stash. This decorative tape is very forgiving and can be repositioned to its appropriate location. Love that!

Thanks Close to My Heart for including Washi Tape (Z1817) in the new Idea Book because it's neutral color allows me to use it with any theme!

Saturday, February 16, 2013

February 2013 Stamp of the Month

I love a great deal don't you?
You can always take advantage of the Stamp of the Month deal every month when you place a $50 or more order, you may purchase the Stamp of the Month for just $5. Otherwise, the stamp can be purchased for $17.95 during that month only. This stamp is available from February 1-28, 2013.

February's Stamp of the Month is Home Sweet Home (S1302A)


I recommend using a 3"x 3" acrylic block (Y1006) when using this stamp.

To order this stamp or any Close to My Heart product please visit my online store at http://www.FrancisAmes.ctmh.com

Friday, February 15, 2013

March Stamp of the Month

This month's Stamp of the Month special is called Floral Happiness. This stamp during this month can be purchased at the regular retail price of $17.95, S1303. However, you can own this very charming stamp for only $5, S1303A, with any $50 or more online purchase at http://francisames.ctmh.com. * Studio J orders do not count towards the $50 qualifying purchase.

 
To recreate the projects in this photograph the following supplies were used:
Chantilly Paper Packet (x7163B)
Adventure Mini Pigment Ink Pad set (Z2501)
Whimsy Mini Pigment Ink Pad (Z2500)
Chantilly Textiles (Z1819)
Irresistable Frames (Z1843)
Cricut Art Philosphy Cartridge (Z1686)


Wednesday, February 13, 2013

Chantilly Scrapbook Layout

I'm sure you've been wondering what I've been up to. Scrapbooking of course! Yesterday was my husband's birthday so I had to of course focus on his birthday and the upcoming Valentine's Day festivities. I figured that the Internet would be filled with Valentine's day card ideas so I decided to take a different approach. I scrapbooked the people I love and included an intimate moment filled with love; the birth of my great-niece.


This layout is similar to the one featured in the new idea as to the layout design on page 18 but I made a few modifications. Did you notice the paper patterns I used were slightly different. They used more yellow card stock and did not mat their photos.I also used the Hollyhock Zipper Ribbon around the baby picture. One customer commented, "I saw the Zipper Lace but didn't know how I would use it. It looks so good around the picture." I got a nod from another customer. I've seen people use this type of product to create a flower on a headband. I wonder how you would use it?


For the second layout, again I used more of that darling patterned paper over the card stock. It's just so beautiful I had to show it off. 

What's not easily visible is that the dimensions and ribbon really make the page pop. It adds texture and visual interest.


Products used:
  • Chantilly Paper Packet (X7163B)
  • Chantilly Dimensional Elements (X7163C)
  • Hollyhock Zipper Ribbon (Z1826)
To order these products shop online at www.FrancisAmes.ctmh.com

The layout design is from the CTMH book 
Magic, layout Showtime.


Tuesday, February 5, 2013

Buzz & Bumble Card

Hello paper crafters!


I've created this simple but cute greeting card using the supplies from Buzz & Bumble paper packet. I had supplies left over even after create two double page layout. It is easy to recreate the same card at home.

You will need the following supplies

  • Buzz & Bumble workshop on the go (one orange and one cocoa cardstock, stamp set, and orange sparkles)
  • Cuttlebug bee embossing folder
  • Embossing machine (such as Cuttlebug, Sizzix Big Kick, Spellbinders machine).
  • Scissors
  • Single hole punch
  • Adhesive
  • 3D Foam Square
  • Water color pencils or alcohol markers
  • Staple
  • Cocoa grossgrain ribbon
  • Sandlewood or Dessert Sand cardstock
  • Colonial White cardstock
  • Ink Pads: Sorbet, Dessert Sand, Cocoa

 To create the card
  1. Fold a 8 1/2" x 5 1/2" Cocoa cardstock in half to create a card base.
  2. Emboss a 3" x 4 1/8" Orange cardstock by placing cardstock in the Bee embossing folder and using an embossing machine. 
  3. Cut a small strip of lined cardstock at 1/2" x 4 1/8" and adhere to the top of the embossed paper.
  4. Stamp the sentiment, You are my Happy, using Sorbet ink onto Colonial White card stock. Then cut around the sentiment for matting.
  5. Mat the sentiment onto a Cocoa card stock and cut around the sentiment allowing a bit of the dark card stock showing.
  6. Place 3D foam squares on the back of the sentiment to create a 3D embellishment. 
  7. Adhere the sentiment to the center of the embossed card stock.
  8. Next stamp the bee image in cocoa ink onto Colonial White card stock. 
  9. Color in bee image using either water color pencils or Honey alcohol ink markers and then cut out.
  10. Create the bee into a 3D embellishment by placing 3D foam square on the back and placing the bee cut out at the end of the left side of the stripped border.
  11. Now it's time to create the pocket by putting adhesive on the back of the embossed card base along the bottom, the left and right sides card stock. This will allow the top portion of the embossed card stock with the stripped paper free of any adhesive.  
  12. Place the embossed card stock on to the front of the folded card base aligning along the bottom of the Cocoa card base.
  13. Embellish the front of the pocket with two orange sparkle bling on the bottom right corner in a vertical formation.
  14. Create a mat for the inside of the card to allow a handwritten message. Cut orange card stock at 3 3/4" x 5" and adhere to the inside of the card.
  15. Next, follow the instructions below for the tag.

 
To recreate the tag:
  1. Create the honey comb patterned tag by cutting a rectangle shape at 3 1/4" x 2 1/2". Then using your scissors cut two angles of the top in order to create a tag shape. Next using a hole punch, punch a hole in the center. 
  2. Using Cocoa grosgrain ribbon at 2 1/2" length and place through the hole of the tag and secure with a stapler. Cut the edges of the ribbon at a 45 degree angle.
  3. Cut the tag's inner mat from cocoa card stock at 1 3/4" x 2 1/2". 
  4. Stamp the seeds image using Dessert Sand ink on to Sandle wood or Dessert Sand card stock. Color in image with color pencils or alcohol markers. 
  5. Embellish with three small orange rhinestone bling. 
  6. Cut out stamped seeds image with scissors and adhere onto the cocoa card stock mat that measures at 1 3/4" x 2 1/2". This can now be adhered to the center of the tag.
  7. Place the tag in a 45 degree angle into the pocket created.
Now you are finished! Fun right?

Monday, February 4, 2013

BUZZ & BUMBLE LAYOUT

So this was the first layout that I've created from the new 2013 Idea Book and choose Buzz and Bumble workshop on the go. Although, workshop on the go includes layout instruction and alternate layouts and projects I choose a different path in order to give you another idea.


Colonial White cardstock was used for this layout's base background. I cut the flower shape out of Cocoa cardstock using my Cricut machine at 8 inches. You will find a flower shape in either Close to My Heart's Art Philosophy or Artiste Cricut cartridge.

The patterned paper was cut at 5" x 11". The dark brown patterned paper is at 3"x 12". The honey comb patterned paper measures at 2 1/2" x 7".  The small pocket that I created was part of the top of one of the patterned papers and it measures at 3 3/4" x  1 1/2".  

 Using the stamp set included in the workshop on the go I stamped the Seeds tag, flowers, and swirly dots in Dessert Sand ink. I colored in the seeds tag using Close to My Heart water color pencils and embellished with the Orange sparkles and Buzz & Bumble Assortment. The alcohol markers also would make these embellishments pop.

I created the title using the font found on Art Philosophy Cricut Cartridge out of cocoa cardstock and embellished title with ribbon and Buzz and Bumble Assortment.
These are just a few of my croppers. Their layouts look great!
For my second page of this layout I used three patterned paper from the same kit. The honey comb patterned paper was cut at 5"x 11", while the bee patterned paper was cut at 6" x 11". The dark brown patterned paper was cut at 2 1/2" x 11". I also cut a strip of the top of one of the patterned papers and layered it on top of the dark brown patterned paper. All pictures measure at 3" x 5 1/8". 

The same flower shape that was cut on page one was also cut on the Cricut machine at 2".  As a finishing touch I placed a Buzz & Bumble assortment embellishment. I think this layout was made in a snap.  

All supplies used:
Buzz and Bumble Workshop on the Go (G1054)
Dessert Sand Ink Pad (Z2118)
Cricut Cartridge Art Philosophy ( Z1686)
Dark Chocolate Stripped Grosgrain Ribbon (Z1617)
Acrylic Blocks Size used 2" x 6 1/2"  (Y1010) and 3" x 3" (Y1006)
Watercolor pencils (3505)
All other embellishments and stamps used are in the workshop on the go.

To order these products visit my site at http://www.francisames.ctmh.com

Check out my blog again on Friday of this week for Valentine card inspiration.


Friday, February 1, 2013

NEW IDEA BOOK

Yippy! You can now view the brand new Online Idea Book pictured below. 

Visit my blog again on Monday to see a new project from this new Idea Book that I created. I'll give you a hit on which paper packet I used... I was buzzy as a bee creating this layout. And my friends are buzzing about all the neat stuff they must have!


To order items from this amazing idea book go to www.FrancisAmes.ctmh.com